As
everyone knows there are a huge number of add ons for the AR15 family
of rifles. Some of these aftermarket parts are very good while others
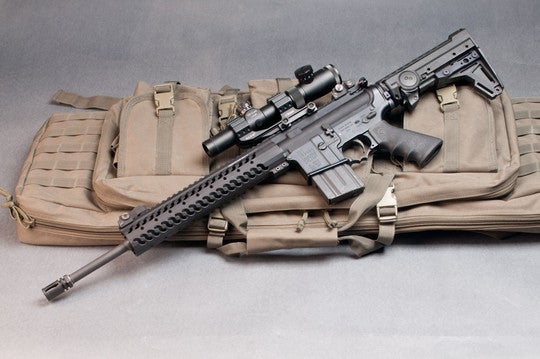
are best ignored. I recently found a new extended carbine rail system
from Apex that’s well worth considering as a replacement for your
current GI grip or traditional four rail.
At
$175.00 the price is very reasonable for the advantages it affords. At a
weight of only 8.1 ounces with three extra rail attachments the weight
is considerably less than the usual free float rail system. Most
standard configurations have four full length rails which are seldom
used in full and just add weight. They can also be pretty rough on your
hands unless you add rail covers, which increase the bulk and size of
the rails.
VIDEO
As
Steve noted when he covered another “slick rail” from SHOT they are
becoming very popular. Many of the companies that manufacture rails are
selling them in some form or are in the design phase. I know some
shooters use them for competition and they certainly are excellent for
three gun matches and other shooting events.
Earlier
today I was reading the US Special Operations Command Fact Book for
2012. Well, lo and behold there were two pictures showing Operators with
configured slick rail systems on their M4′s. I guess you don’t get a
better endorsement than that!
The
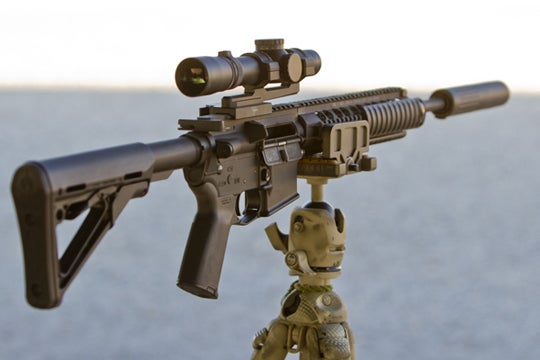
Apex extended carbine system allows the AR15 owner to add assorted
short rails to a greater number of locations than a standard system.
Extra short rails of one inch to four inches can be placed in eight
locations around the entire tube utilizing the milled slots. Most of us
only need a flashlight mount and possibly a vertical grip. If you want
to add additional items just add an appropriate size short rail in the
location best served for that add on. The Apex rail system has the
capacity to add four QD sling attachments; two on each side. If you use a
single point sling no problem just leave them open for later use if
needed.
The
top rail is 7.5 inches long and mates perfectly with the receiver rail.
The external diameter of the tube is 1.970 inches, which is much less
than standard rail systems.
This photo shows the textured “Gator Grip” on the Apex rail
Apex
has also solved the rough surface problem most rails have by milling a
grip surface they call a Gator Grip. This gives the shooter a firm grip
without being abrasive to the shooters hands.
I
bought mine about a month and half ago and really like it. I can almost
touch thumb to forefinger around the circumference of the tube. You
wouldn’t think the weight saved would make much difference in handling
but it does. I’ve found it easier and faster to maneuver. This is partly
weight as well as the increased grip area. I’ve yet to find any reason
to add a vertical grip or any other device to make handling easier. The
model I chose is the extended carbine version. This adds about an inch
and a half to the length on either side of the front sight as compared
to a standard carbine size.
Handguard Installation to Rifle:
MAKE SURE WEAPON IS UNLOADED BEFORE INSTALLING HANDGUARD ON RIFLE.
A
factory barrel nut will be required to be installed and properly
torqued according to rifle manufacturer’s specifications (generally
between 30-80 foot pounds), if assembling a rifle from the ground up.
If
retrofitting an existing upper assembly, remove existing handguard and
delta ring leaving the factory style barrel nut in place.
If using a low profile gas block, whether covered by the tube or exposed, the gas block can be installed at this point.
If using a front sight gas block, it must be secured in place after the handguard is installed.
Place
the two halves of the Apex Handguard System clamp around the barrel nut
and thread the four included socket head cap screws partly in, leaving
loose enough to allow some movement in the clamp.
Slide
the end of the handguard tube with the four holes over the clamp and
loosely install the four included button head screws. (If permanently
installed muzzle device prevents the tube sliding on from the muzzle end
of the barrel, it can be placed from the rear before the clamp is
installed.) The holes will only align in one position, assuring proper
positioning.
Once
the tube is over the clamp, position the assembly so that the clamp
screws are facing the bottom of the rifle and snug all screws evenly,
maintaining an equal gap between clamp halves. Lastly, tighten all
screws evenly to prevent movement of clamp.
If
a front sight gas block is used, it can now be secured in place.
Extended Apex Handguard System models require removal of the original
sling swivel. Additionally, the ears of the swivel will require
trimming. An access for pinning the front sight gas block to the barrel
is provided by a hole in the side of the handguard tube.
After
final safety and function checks, it is recommended that one screw at a
time be removed and secured with Blue Loctite or equivalent, and
torqued to approximately 50 inch pounds. As with any piece of equipment,
the screws should be checked periodically for tightness.
The
rail system is available in standard carbine, extended carbine,
mid-length, extended mid-length and rifle length. Extra small, small and
medium attachment rails are available on the Apex website.
After
having used this Apex rail for some time now It’s staying on my rifle. I
donated my original rail to a friend. I actually have been looking for a
new rail system for my AR for a couple of months now until I found this
one. This one is sturdy and fits my needs very well.
 American Tactical recently introduced the new GSG Target 1911 chambered in .22LR. American Tactical is the exclusive importer of the new GSG Target which features a new target-style wood grip, adjustable rear sight and magazine extension.